Wednesday, October 30, 2013

Happy Halloween!!!

Today is my most favorite day of the year. I love everything about it. The cool crisp air, the falling leaves, the costumes, the candy. Anyway, I don't have anything to post, but I will be back on Thursday to share something fun with you!!
 
 
Happy Halloween!!!

Tuesday, October 29, 2013

October Club Projects

Good Morning Everyone!!! Today I am going to show you the projects we did for my club.
Have you heard about the envelope punch board?
 
 
It's one of the newest tools that Stampin' Up has to offer!! This thing will make over 50 different sized envelopes. Who knew making an envelope could be so much fun, but that's not all.
 
This punch board also makes cards and boxes. You heard me right boxes. Here's what we made in club this month.
 
This is the whole ensemble, It's a box that hold 4- 4x4 cards and matching envelopes.


This is an up close picture of the box. Look at those leaves, the different textures are so fun. Also I love the burlap ribbon. It's really nice because both sides are finished. It won't fray and have you noticed, burlap is everywhere!!


This is the matching card. It's a simple design and features the Sweater Weather DSP.

 
Notice how I put a little Velcro dot on the back of the box. This keeps everything inside, nice and snug. Wouldn't this be a great gift to receive? Or better yet, wouldn't this be a great gift to give?
 
There are several different Youtube videos on how to make a box. Just search "Envelope Punch Board" and you"ll find many ways to use your new toy!!
 
Happy Stamping and Enjoy your day!!


Friday, October 25, 2013

Friday Mashup #133

It's Friday and that means Friday Mashup time again. This weeks challenge is a color challenge.
 
 
Here's your Mashup Challenge:
  1. Create a project with the colors "Coastal Cabana, Crushed Curry, Smoky Slate & Basic Grey."
  2. Create a project with a "Cake."
  3. Or Mash it Up and create a project "with a Cake using the colors above."
 
Here's my card.


Head on over to the Friday Mashup and play our challenge.
 
Happy Stamping!!


Thursday, October 24, 2013

Thank You Mickey


We just got back from Disneyland and we had such a wonderful time. My In-Laws & Brother-in-law went with us to help out with the kids. I thought it would be nice to say "Thank You" in style.
 
 
My favorite thing about this card is the simplicity of it. It's so crisp and clean. The stamp is
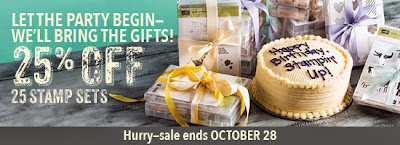
"A Dozen Thoughts" This is quickly becoming one of my favorite stamp sets and guess what, it's on sale this week for 25% off.
 
It's Stampin' Up's Birthday and for the next 5 days they have chosen 25 stamps for 25% off.
 
Click the picture to view the stamp sets.
 
 
Email me what you want or buy directly from my online store.


Happy Stamping!!!


Wednesday, October 23, 2013

What She Wore Wednesday


Happy Wednesday everyone! As my kids would say, it's camel day (hump day) middle of the week. Anyway, today's card is based off another one of my daughter's outfits.
 

When I saw this onesie, my thought was  "How Sweet". I'm not usually a bird person, but I couldn't resist this one.
 
 
I really like the way this card turned out.
 
 
The colors are Soft Sky (1st time I've ever used this one), So Saffron, Blushing Bride & Calypso Coral. It ended up being a very simple card, but I decided that was okay. Sometimes we just need something simple.
 
I also used Betsy's Blossoms, A Dozen Thoughts & Everything Elenor Stamp sets. Both the Betsy's Blossoms & A Dozen Thoughts are on SALE right now for 25% off. It's Stampin' Up's birthday and they are celebrating by putting 25 stamp sets on Sale!!
 
Click on the picture below to check out the stamp sets.


Click HERE to purchase the ones you want in my online store.
 
 
Happy Stamping Everyone!!


Tuesday, October 22, 2013

The Happiest Place on Earth--DISNEYLAND!!!


So we just spent a wonderful week in the happiest place on earth. DISNEYLAND!!! It was so much fun. Of course as I was prepping for this vacation, I knew that I would need a signature book. It was something that needed to be durable and hold up. MDS to the rescue!!!  I made a signature book out of the swatch books that Stampin' Up sells through MDS.
 
 
This was so easy to do. I needed 5 books so I made the first one, copied it 5 times and then changed the name to individualize it for each kid. Next I printed it off and a week later I had me some fun signature books!!!
 
 
On some of the pages I put characters that I knew we would see and then I left most of them blank for the surprise visits. The only thing I would recommend would be to replace the screw with a ring.
 
If you're interested in some of these pretty little guys, email me I would love to personalize it and get them printed for you!!
 
Happy Stamping!!!


Friday, October 18, 2013

It's Friday Mashup!!!

 
Today is Friday and guess what that means. It's Friday Mashup Day! I also have some exciting news. I've been chosen to be part of the              
Friday Mashup Design Team.
AHHHHHHHHHHHH! (Imagine me screaming) I am so excited for this opportunity.
 Take a few minutes to visit their blog and participate in today's challenge.
 
 
Here's your Mashup Challenge:
  1. Create a project with a  "Tree or Leaves."
  2. Create a project using the "Color Orange."
  3. Or Mash it Up and create a "Project with Leaves/ Tree & the Color Orange."
 
This is my first challenge. One of my most favorite things are candied apples.
 
 
This one is an "Apple Pie" apple. These things are to die for and so is the topper on the bag.
 
I had fun using the Autumn accents die with the embossing folders.
You also can't go wrong with that burlap ribbon.
Check out the Friday Mashup Blog and see what the other designers have created this week.
They are super talented!!


Thursday, October 17, 2013

Day 13- Happy "Owl"oween

 
Ahh!! The last day of our  Halloween Treats. Hopefully you've been inspired and you still have plenty of time to make all these wonderful goodies we've seen.
 
Today's project is certainly the best. No Halloween season would be complete without a visit from an owl.


Isn't he adorable? I purchased him at the local wood store. His body is done in the Witches' Brew DSP. I used the Black & Orange glitter for his wings and beak. I even painted his little eyes with my white craft pad. You can do anything with Stampin' Up product!!
 
This little guy would complete anyone's Halloween collection.
I hope you've enjoyed this little adventure we've been on. I hope to do more things like this in the future. In the mean time, come back everyday to check out a different project.
 
I feel like I might see some scrapbook pages on the horizon!!
 
Happy Stamping!
 

Wednesday, October 16, 2013

Day 12- Bag O' Candy

 
Good Morning Everyone!! Today's project is featuring the cute little muslin bags in the Holiday Catalog. Be sure to pick some of these up.
 
 
I've seen numerous ways to decorate these. All I did was use a sponge dauber to make the dots. I then cute out the letters "BOO" and used the negative to make a stencil. It was pretty simple and didn't take much time. What an easy project!! We love these!!!
 
Go ahead, give it a try!!
 
Happy Stamping


Tuesday, October 15, 2013

Day 11- Halloween Wreath

 
So along, with the Halloween Banner we made earlier this month, you can also make this super cute wreath.


Jill Olsen, who is in my upline, sent us a video on how she made these.. I thought they were so cute. It's a Halloween Wreath made with paper. I went to the local box store and bought a 6 inch foam wreath. I then took 6- 6x12 pieces of DSP and cut them into 1/2 inch strips. Next you curl them with your bone folder. Last, you start putting them on the wreath one by one with a push pin. Just start filling in the space and before you know it, you have this cute little wreath.
 
Enjoy!!
 
Happy Stamping!!!


Monday, October 14, 2013

Day 10- Hand Sanatizer Box

 
A couple of years ago, I saw these cute little boxes that hold hand sanitizer. They were created by the very talented Erica Cerwin. You can visit her blog here.


Aren't they stinkin' cute? Erica has a wonderful tutorial on how to make these. Don't you think these would make a great teacher gift for Halloween?
 
Try it out and see what you come up.
 
Happy Stamping!!


Friday, October 11, 2013

Day 9- Pumpkin Treat Holder


Today's surprise is simple, but fun!! I saw this on Pinterest and knew that it was a keeper.
 
 
I took a 3x8 piece of Tangerine Tango Cardstock. Score @ 2 1/2", 4 1/2", & 7. Fold it into a triangle. You will be left with a one inch flap. Punch a hold on this line for the stem of the sucker.

 
Here's a side view. I had to use a dimensional to keep the sucker in place. Wouldn't these be cute to make at the kid's school Halloween Party?
 
Hope you Enjoy!!
 
Happy Stamping!!!


Thursday, October 10, 2013

Day 8- Witches' Broom

 
There's a bumper sticker that says, "My other car is a broom!!!" Lol!! When I saw the little broom in the Holiday Catalog, I knew I wanted to make it. Mine is a bit tweaked.


To make this broom, 1st you put your licorice in the 1x8 cellophane bag. 2nd, I took some coffee filters (2) and sprayed them with my Stampin' Up spritzer (Black Ink). Then you fold the filters in half, and cut up to the fold. Then make a tiny slit to put the handle through. Although you can't see it in the picture, I used washi tape to attach the filter to the licorice. I then stamped my tag and tied it on with a bow.
 
 
Happy Stamping!!!


Wednesday, October 9, 2013

Day 7- Rosette Belly Band

 
So one of my most favorite things at Halloween time is the little "mini" bags of popcorn that come out. They are so cute. Of course nothing is complete however, without and little bling, bling
Stampin' Up Style.


It's really such a simple thing. This is so easy to do!!! I cut the black cardstock      1 1/2 x 11, DSP- 1 x 11, folded both of them around the popcorn before I attached the DSP to the cardstock. After you secure the band, make your rosette (there are many different methods) and glue on the band. Last, stamp your image, and assemble onto the belly band.
 
This treat would be a great alternative to all the candy the little
Trick-or-Treaters are going to get this year.
 
"Spook"tacular Stamping!!!!!


Tuesday, October 8, 2013

Day 6- Scrapbook Page

 
I don't know about you, but Halloween is my absolute most favorite holiday. Sooooooo of course I need a scrapbook page to capture all the kidos in their Halloween costumes.
 
This year, instead of being behind, I am on top of it.
 
Here it is..........
 
 
Isn't the Halloween Bash stamp set so versatile? I've used it on so many different things. I also used the Witches' Brew DSP along with the Halloween Hello Stamp set.
 
Here are a few close ups.
 
 
Although the picture doesn't show it very well, I used rhinestones on the scallop circles. You'll also notice the Pumpkin Pie chevron ribbon cut in half. I like this look because one side frays a little. I also used the spiderweb embossing folder that was retired:( a couple of years ago.
 
 
Here's a better look at the embossing folder as well as the stamp set, Halloween Bash.
 
Today's Supply List
 
-Witches Brew DSP
-Halloween Bash Stamp Set
-Halloween Hello Stamp Set
- Deco label framelits
-1 3/8 inch circle punch
- 7/8 inch scallop circle punch
-Pumpkin Pie Chevron Ribbon
-Basic Gray 1/4" stitched ribbon
-Rhinestones
 
 
Happy Stamping!!!!


Monday, October 7, 2013

Day 5- Bundle of Pixy Stix

 
Sorry about the late post today. A sick kid threw off my morning. Anyway, today's treat is a little bundle of Pixy Stix. I have seen these everywhere.


You take the largest shape in the Apothecary Framelits and cut it out. You then score both sides, about 1 3/4 inches in from the point and fold it. I then decorated the front with burlap (very cool) and put some pieces of ribbon through the top. You could put anything you want in here.
 
Hope You Enjoy!!!


Friday, October 4, 2013

Day 4- Halloween Banner


So you remember that "Party" we made an invitation for? Well no party is complete without decorations. However, this decoration doesn't have to be for just your party. It can reside anywhere in your house, all month long.
 
It's a Halloween Banner!!!
 
AHHHHHHHHHH! When I saw this in the Holiday Catalog, I knew exactly where it was going to go. In fact, before I saw the Holiday Catalog, I was thinking that I needed to make a banner for this exact spot. Stampin' Up came through and made my life easy.
 
 
Here is a close up of some of the pennants.


To make this adorable banner, you need the following:
-Build a Banner Simply Created Kit (133507)
-Halloween Banner Simply Created Accessory Kit (132698)
-Sponge Daubers (102892)
-Pumpkin Pie Ink Pad (126945)
-Basic Black Ink Pad (126980)
-Summer Starfruit Ink Pad (126991)
 
You can order these things at my online store.
 
Have a "Spook"tacular Day!!
 

Thursday, October 3, 2013

Day 3- Box of Nuggets


I absolutely love to decorate these nuggets for any occasion. This project was super easy to make.
 
 
Wouldn't you love to get one of these from someone?
 
First I made the box. I started with a 3 3/8 x 3 3/8 square. I then scored it 1/2 inch in on all four sides.
It should look like this.
 
You then cut where you see the white lines in the picture. Bend on the folds. I used glue dots to tuck the tabs in. Wah lah!! you have a cute little box to put your nuggets in.
 
Next I cut 1x3 inch strips to wrap around the nuggets.
 
 
Arrange everything in the box. Slip the box into the cellophane bags (4x6) sold by Stampin' Up. Last you make a bag topper. I used the Deco Labels Framelits, folded it in half and stapled it onto the bag. I took the Halloween Bash stamp, "Eat if you Dare" stamped it once in black and once in pumpkin pie. I then put the two together with dimensionals and last, but not least, I tied a little bow out of the 1/8 taffeta ribbon and adhered it with a glue dot.
 
Have a spooktaclular Day!!!


Wednesday, October 2, 2013

Day #2- Creepy, Crawly, Halloween!!

 
So every good Halloween Season, needs a good Halloween Party which means...... Yes we have to make an invitation!!! It doesn't have to be fancy just striking!!
 
 
Using the Withes' Brew DSP and Halloween Bash Stamp set makes it easy, peasy to create your Halloween invites.
 
Here are the Supplies needed:
- Basic Black Cardstock (121045)
-Witches' Brew DSP (132185)
-Pumpkin Pie Cardstock (105117)
-Deco Label Framelits (130102)
-Modern Label Punch (119849)
 
Go ahead, get your invite on and create a "Hauntingly Beautiful" Card.
 
"Spooktacular Stamping"


Tuesday, October 1, 2013

13 Days of Halloween!!!

Today is the first day of October!!! This is my most favorite month of the year. I've been very excited to start something new. For the next 13 days, you will be given numerous ideas for Halloween treats, gifts and goodies.
 
On the first day of Halloween, I created "Bats About You" goodies. These are made using the
Goodie Gear Simply Created Kit. They are soooooooooooooooooooo easy to use.
 
 
Don't you just love those Hershey Kisses? I've seen this in a few places. You just punch out circles and glue them to the bottom. So cute. This is a great way to use your scraps. Everything in the kit comes ready to use. It includes, cellophane bags, oranges strips to decorate with, tags ready to punch and get this, even the Baker's twine is pre-cut!! I added the bat wings.
That's how Stampin' Up rolls!!!
 
Here is an up close picture of the bag
 
 
And of course, when you have a treat, it needs to be shared so, this is what my club ladies are getting for their Halloween treat!
 
 
Thanks for stopping by for the 1st day of Halloween. To order the supplies head on over to my online store.
 
Supply List
- Pumpkin Pie Goodie Gear Simply Created Kit (132792)
- Basic Black Cardstock (121045)
- 3/4 circle punch (119873)
- Large Oval Punch (119855)
 
Have a Spooktacular Day!!!!